Manually typing captions or subtitles for video in Adobe' Premiere' Pro video files is a thing of the past. With the free Trint extension, automatically send your audio or video files from Premiere Pro to Trint to be transcribed, then easily add captions (SRT or EDL) to your project in seconds.
Let's take a quick look at how to install and use Trint with Adobe' Premiere' Pro.
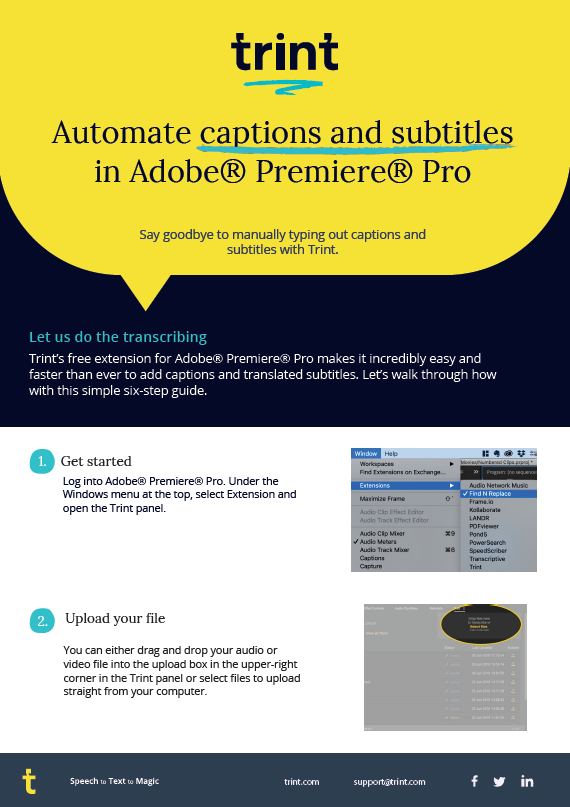
After you've downloaded and installed the Trint extension for Adobe' Premiere' Pro, open the Trint panel (Window > Extensions > Trint). Please note, you must have a Trint account with credit to use the Trint extension. To create a Trint account, click here.
When you've opened the Trint panel and logged in to your Trint account, you'll be able to see your Trints. The following details are displayed:
You can also download our easy how-to guide to learn how to set up Trint's free Premier extension.
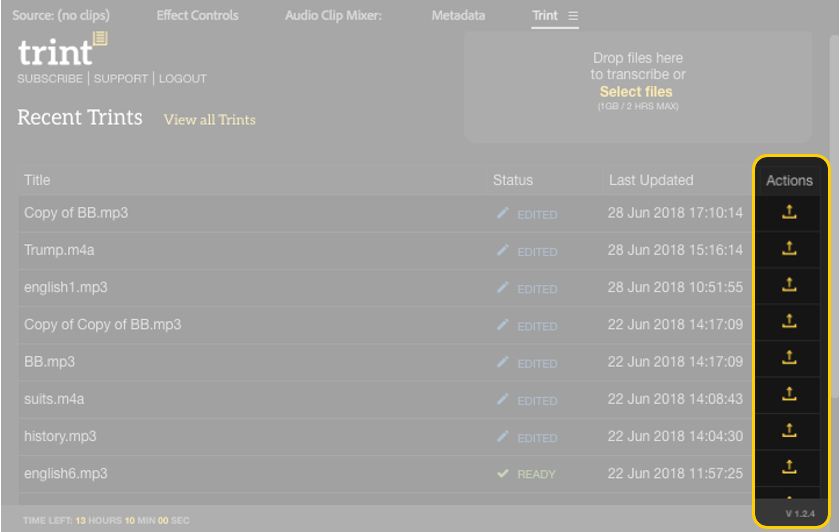
1. Upload To upload an audio or video file for transcription, either drag it from its location on your computer to the box in the upper-right of the Trint panel ("Drop files here to transcribe or Select files") or click "Select files" to find the locate on your computer:

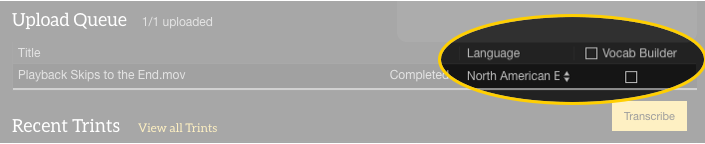
2. Select Transcription Options The audio or video file will automatically start to upload to Trint for transcription. While it's uploading, select the language and whether you'd like to use your custom words in Vocab Builder:
>3.Download Captions/SubtitlesAfter the file has finished transcribing, click the icon in the Actions column to download the caption file to your computer:
4. Select File Format Select the file format you'd like to download, either SRT or EDL:
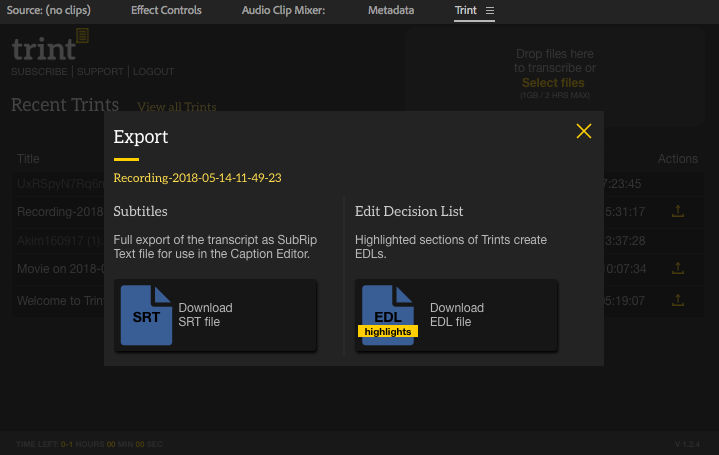
5a. SRT For SRT files, select your preferences, including subtitle/caption length, whether to display speaker names, the position and case:

The caption file will be downloaded to your computer. To add the captions/subtitles to your project, locate the file and drag it onto to the project timeline.
5b. EDL If you're using an EDL file, we recommend selecting the default preferences from the popup windows. When the EDL files download, select "File > Import..." then locate them on your computer. Open the folder from the Project panel, select all the files and select "File > Link media..." The video cuts are displayed with the fully edited/merged file first, followed by each individual clip. To add the captions to the cut video, download the SRT file from the Trint extension, making sure to check "Highlights only," then import the SRT file, link the media to the original video file, and drag the caption file onto the Project panel to sync.
--
Ready to give Trint a try?


